Step -By-Step Instructions
- Stop Draughts
- Reduce Noise
- Save Energy
- Stop Dust and Pollen
- Rain and moisture proof
- Fills gaps from up to 10mm
- EVS DIY Packs
- Permanent solution
- Stop Draughts
- Reduce Noise
- Save Energy
- Stop Dust and Pollen
- Rain and moisture proof
- Fills gaps from up to 10mm
- EVS DIY Packs
- Permanent solution
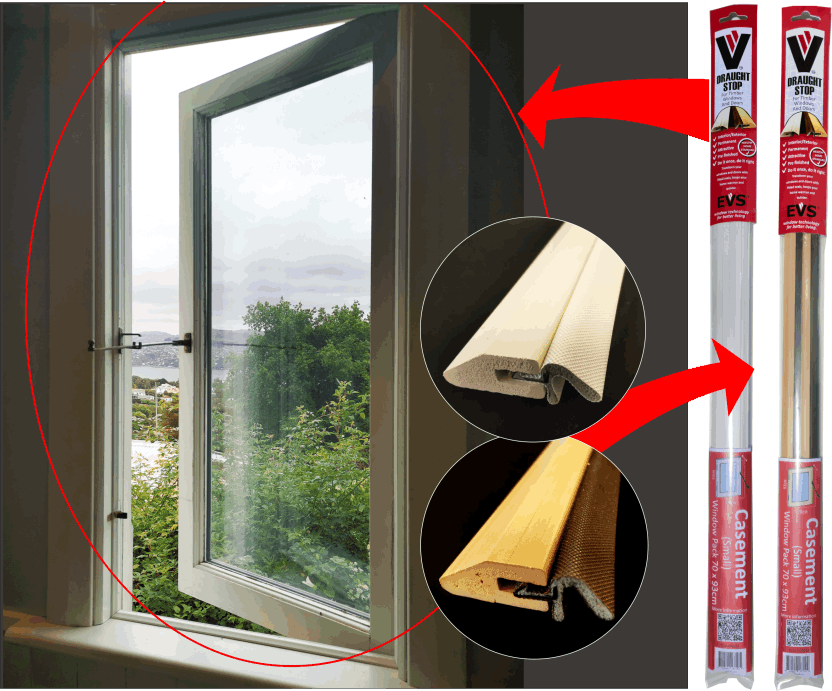
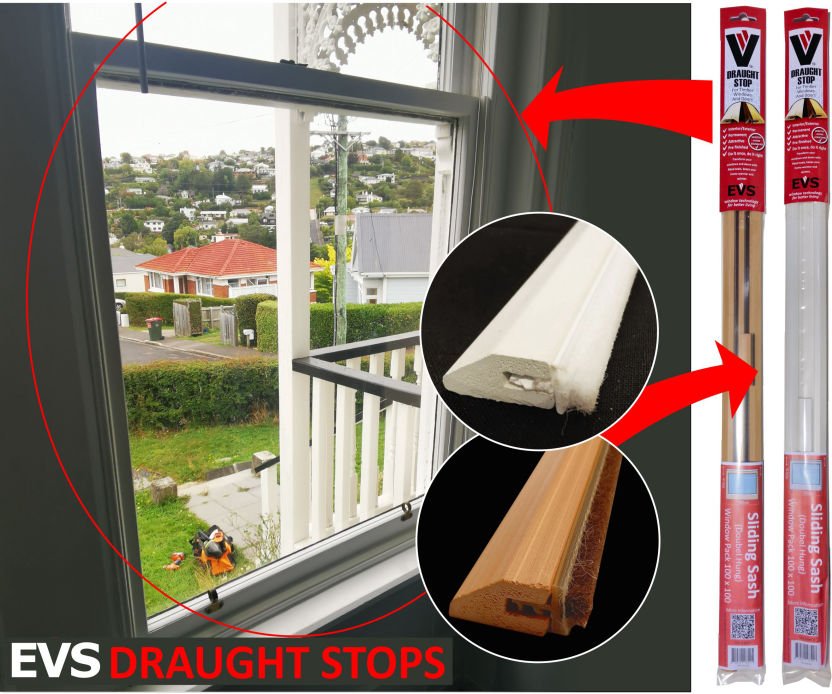
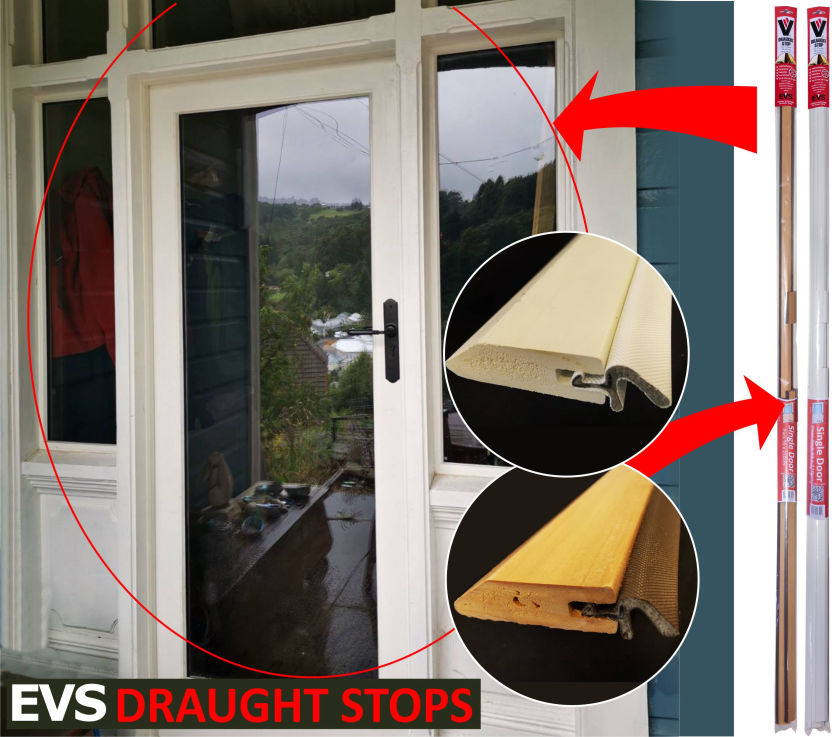
EVS Draught Stop DIY Packs
The DIY Casement Draught Stop packs provide a solution that is ready to be installed into common sized timber framed windows. There are common sizes of casement windows and EVS has developed a small and large pack size to minimize waste and make it easier to get targeted installation steps.

You can use common home DIY tools such as a small mitre saw with a fine tooth blade or a fine tooth handsaw. You will also need a good tape measure, screw drivers, a sharp pencil, and gap fillers
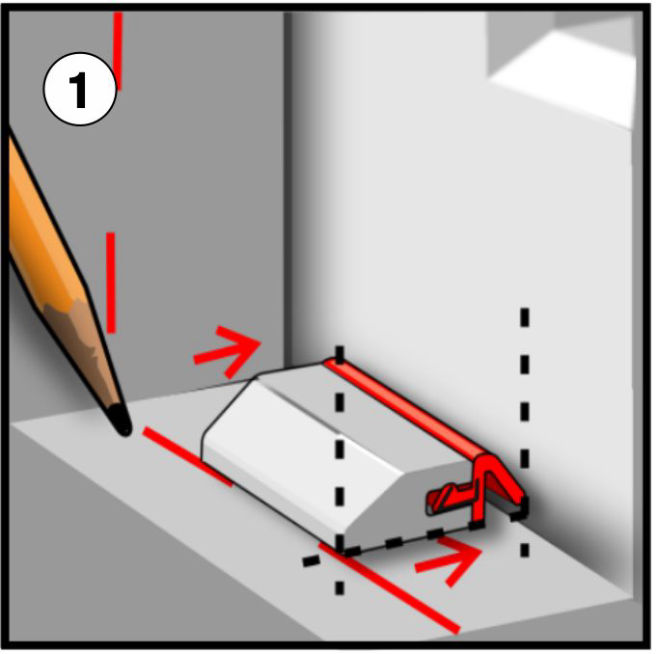
Mark out guide lines around the window using the small block on the sides and the wide block on the base with the window in a closed position.
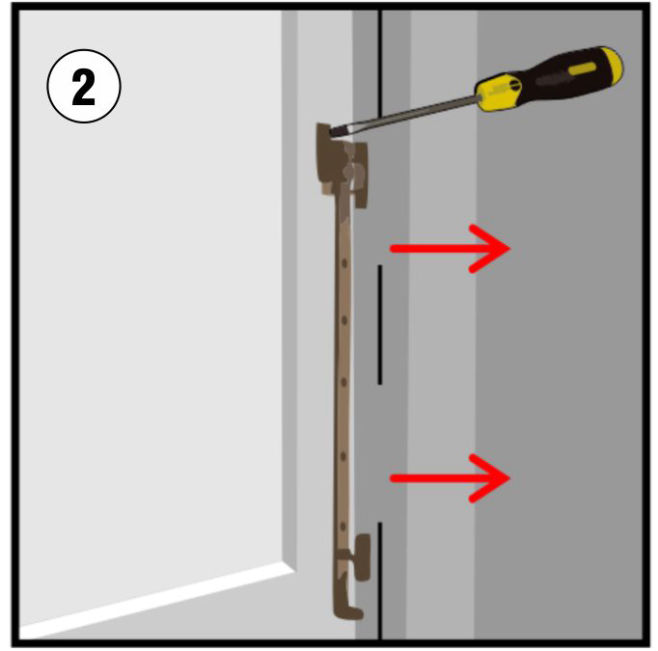
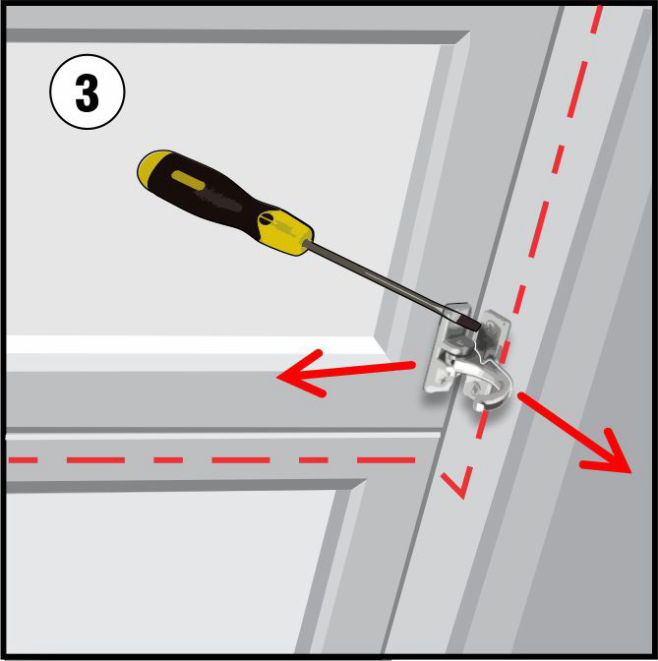
You can either trim your seals between the hardware or reposition the hardware to make room for the seals. Mark the position so you can relocate it at the same height position.
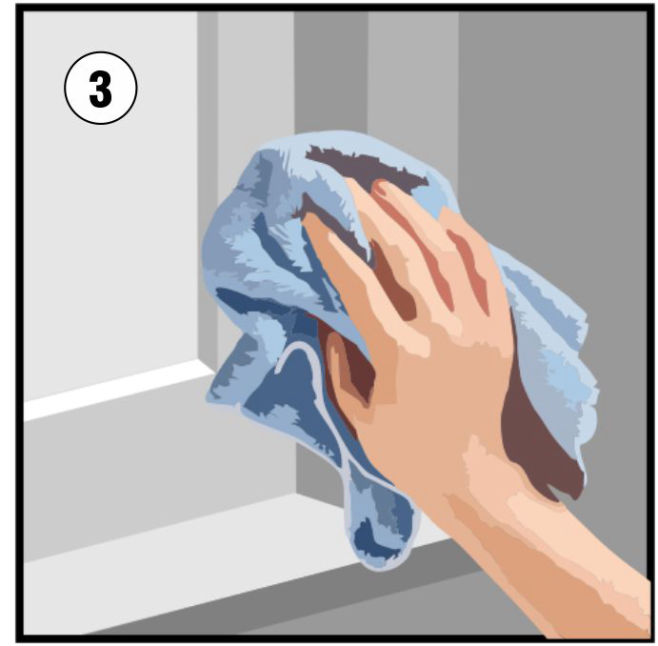
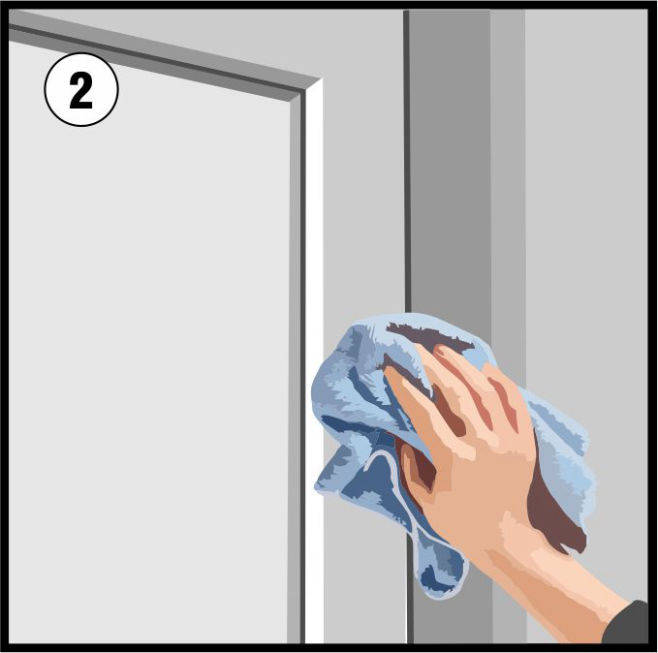
Clean the edges so they are free of grease, dust and loose flaking paint. Make sure they are dry before applying the seals.
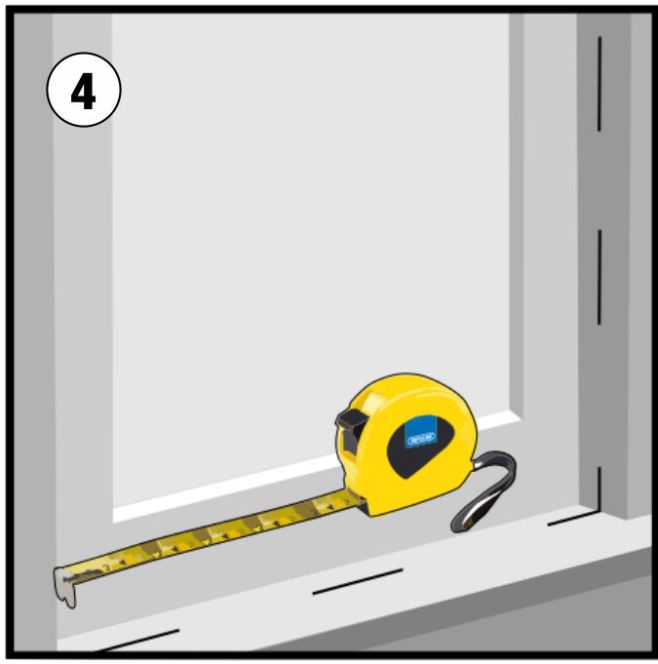
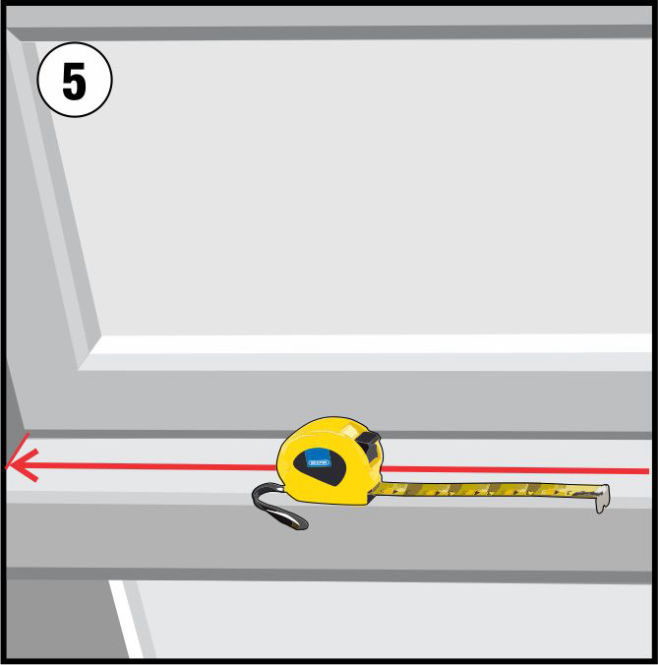
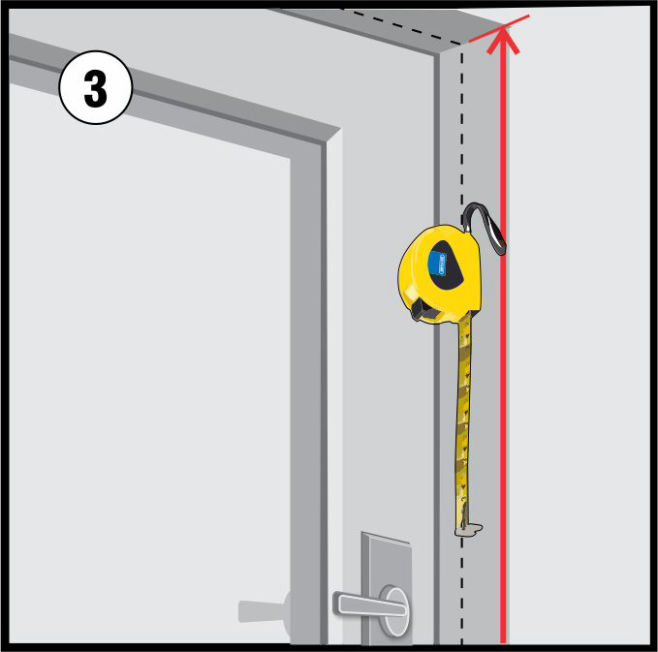
Measure between the inside faces and transfer the measurements to the back side of your Seals profiles.
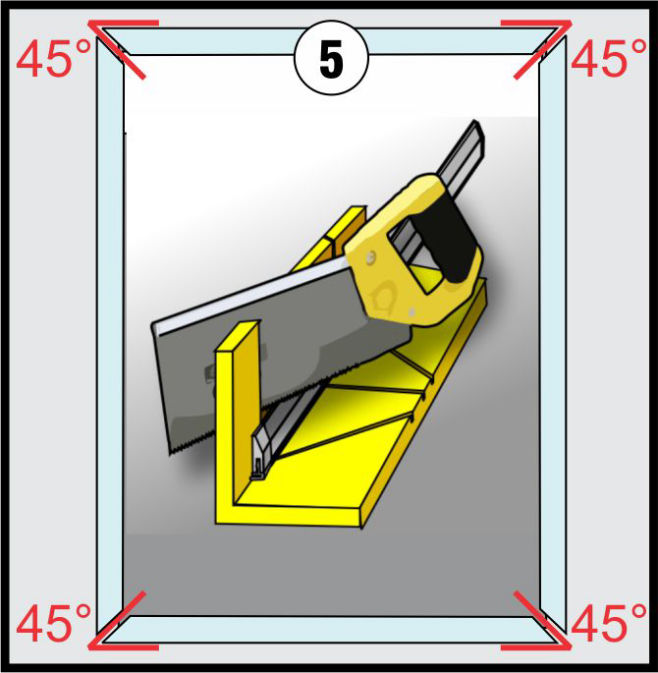
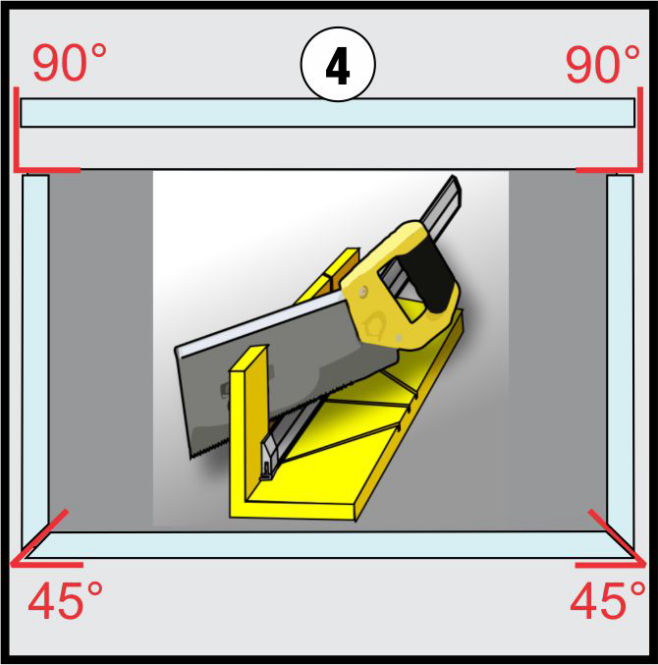
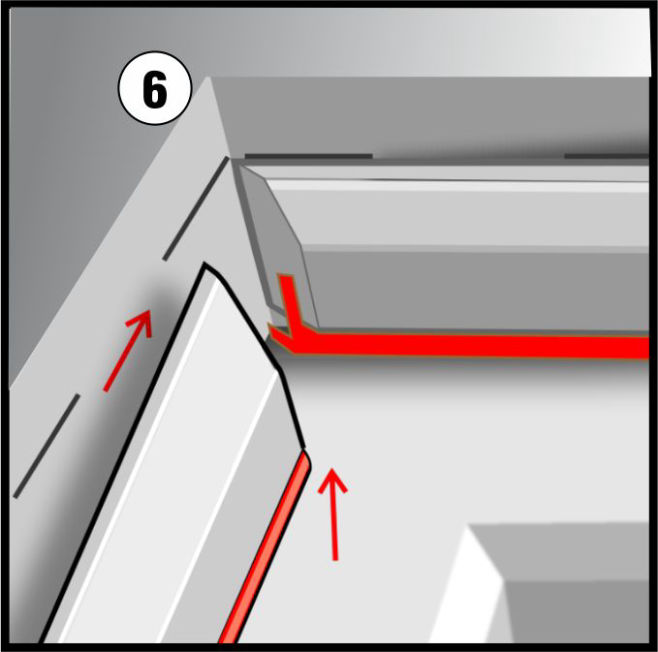
Trim all the corners with 45° mitre cuts to form a nice joints using a mitre box or a mitre saw. Have the soft seal facing downwards with the back against the cutting support.
Trim all the corners with 45° mitre cuts to form a nice joints using a mitre box or a mitre saw. Have the soft seal facing downwards with the back against the cutting support.

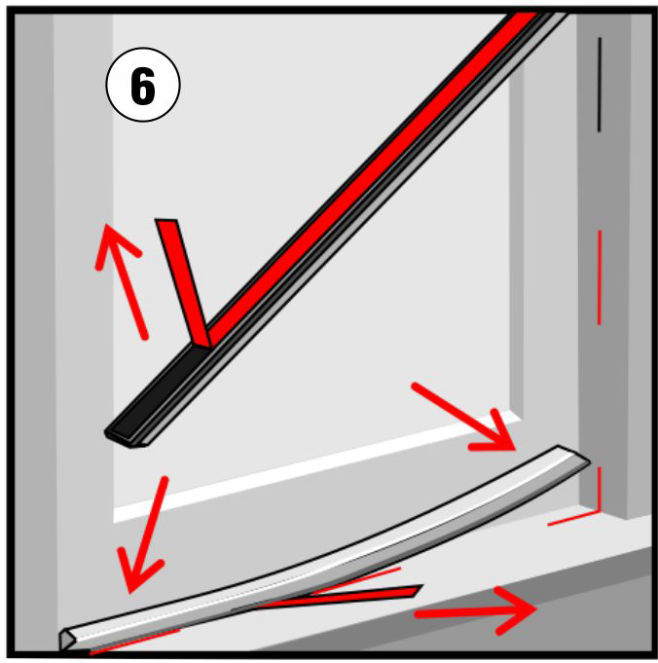
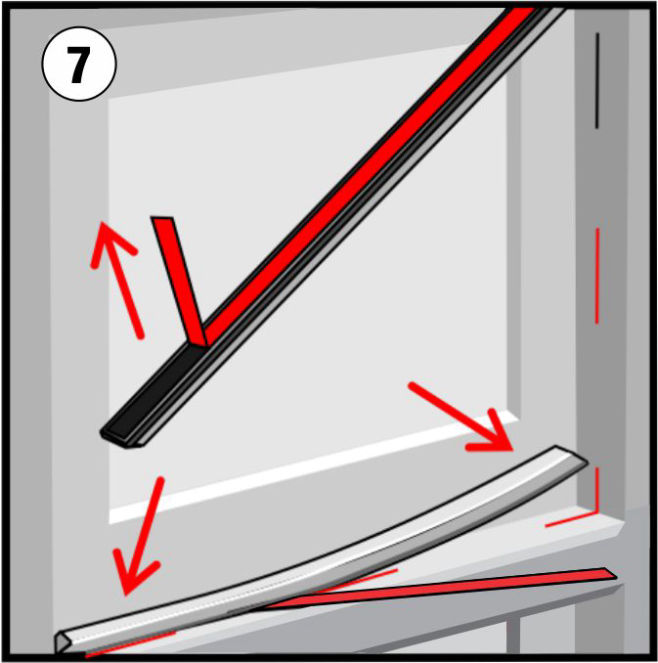
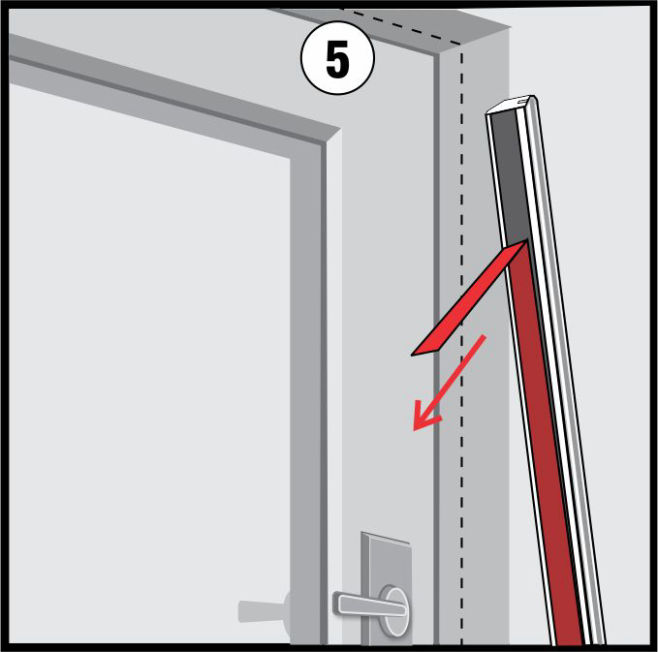
Start with your shorter lengths first and then bend and fit the longer lengths last. Use your marked line to guide your position for the final location. Make sure the corners meet nicely together.
If the hardware has to be repositioned then relocate the holes 9mm sideways on the sash face to provide the clearance for the new seals. Drill new 3mm screw holes for the hardware getting fitted onto the seal profile. Different hardware may require different fitting.
Acrylic gap filler like ‘No-More-Gaps’ can be used to fill the mitre joints. Use a damp cloth to clean the area for a tidy result.
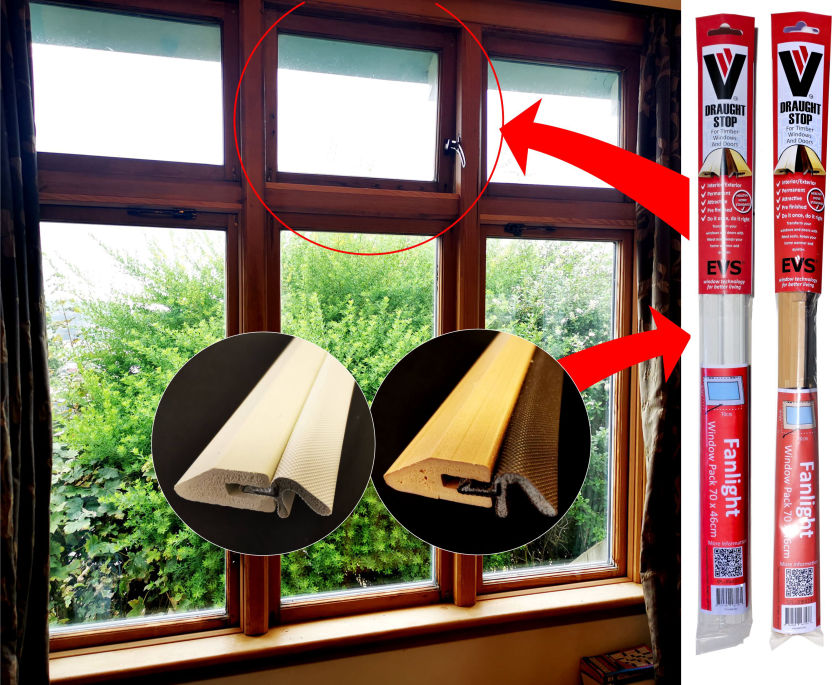
EVS Draught Stop DIY Packs
The DIY Fanlight Draught Stop packs provide a solution that is ready to be installed into common sized timber framed windows. There are two types of fanlight window, 'transom' and 'Split rail' that both can have an EVS fanlight pack fitted with minimal waste step by step instructions on their installation.
You can use common home DIY tools such as a small mitre saw with a fine tooth blade or a fine tooth handsaw. You will also need a good tape measure, screw drivers, a sharp pencil, and gap fillers
Mark out guide lines around the window using the small block on the sides and the wide block on the base with the window in a closed position.
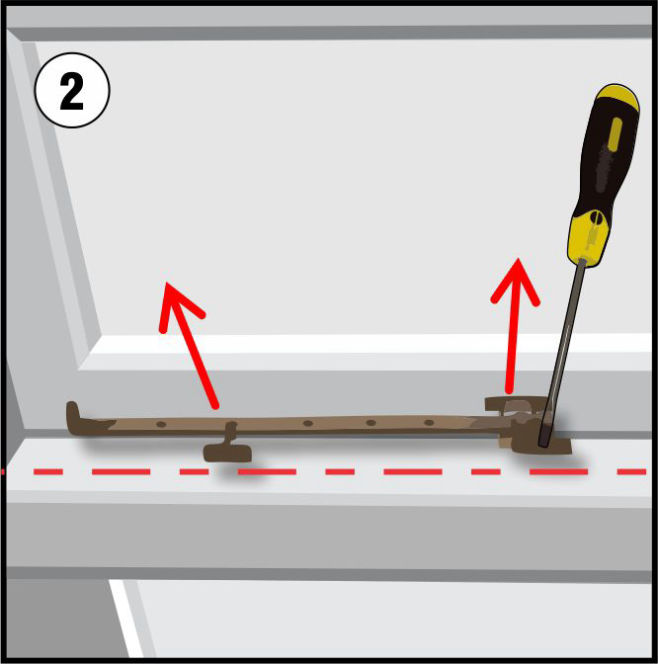
The transom fanlight usually has short stay mounted on the transom that will need removed to allow the wide seal to be installed.
The Split Rail Fanlight has no transom and can be closed using a variety of catch mechanisms. The most common are the side catches that can be repositioned to allow the seal to be fitted, or trim the seals between them.

Clean the edges so they free of grease, dust and loose flaking paint. Make sure they are throughly dried before applying the edges seals.
Measure between the inside faces and transfer the measurements to the back side of your seal’s profiles. Or slightly over measure and cut so you can accurately mark the size against the seal’s profile.
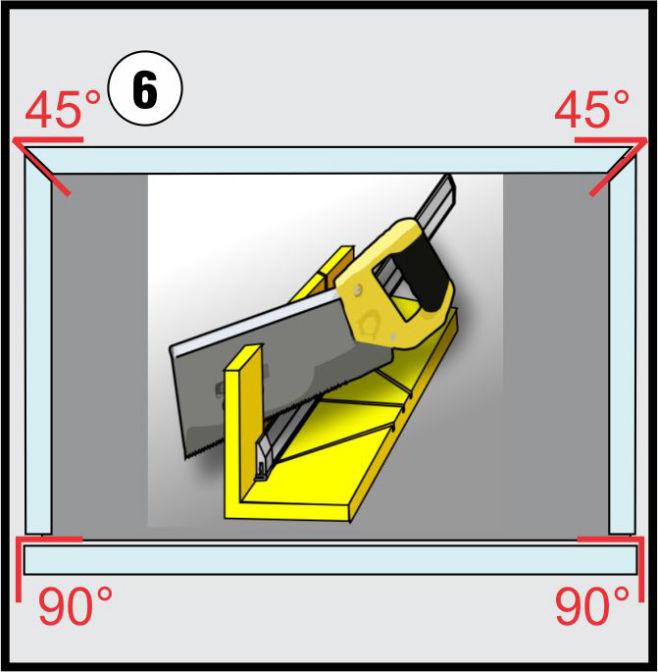
You have a wide draught stop to be used for the base which is cut at 90° to fit the full width. The other narrow Draught seal is used for the sides and top with the top corners trimmed at 45° mitre cuts to form a nice joint.
Peel the beginning 10cm back tape of from your bottom section and press it firmly into marked position then pull back the rest of the backing tape and press down firmly.
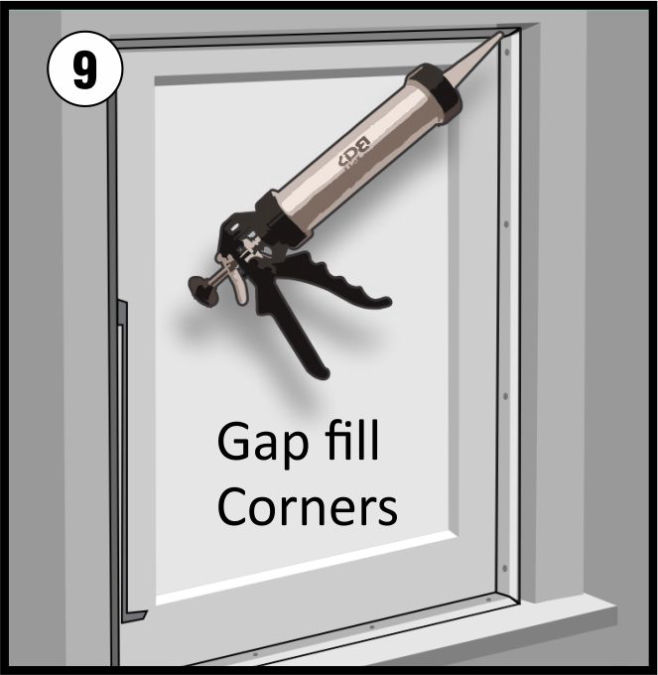
You can use sealant to fill the corners for a tidy finish.
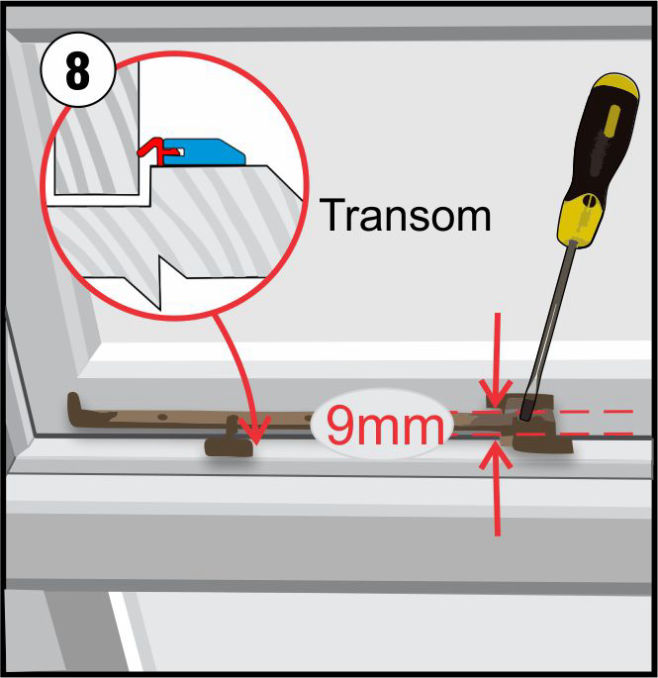
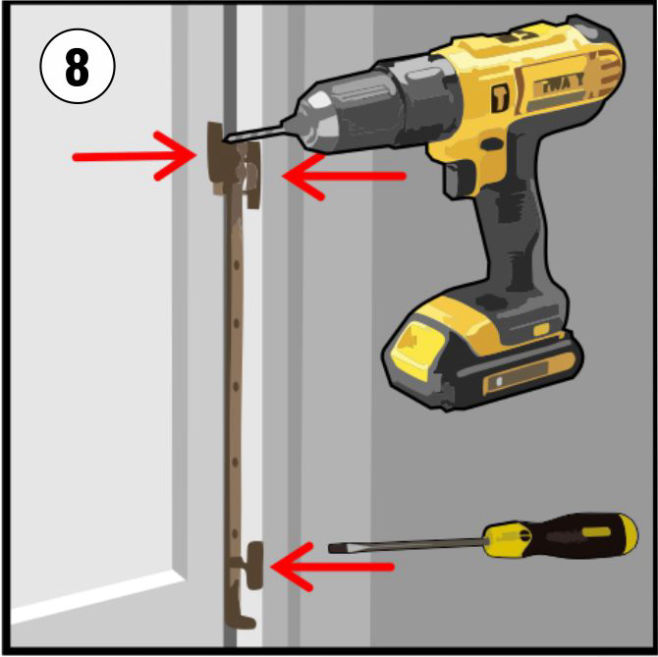
The transom stay will need to be lifted up by 9mm to allow the seal to be installed. Measure up from the old holes and drill new holes and re-fix the hardware.
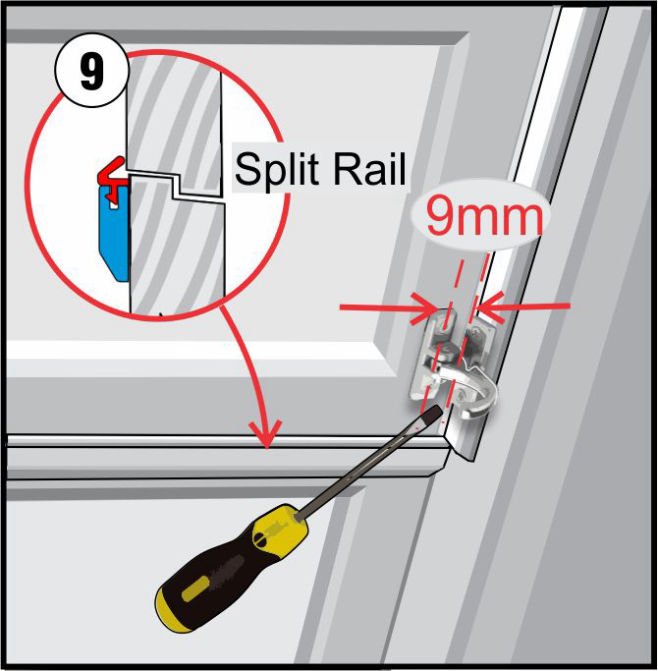
The Split rail doesn't have a transom and can have a variety of other hardware solutions. You generally can fit the seals between the existing hardware or you may have reposition the hardware over the new seals by moving the catch 9mm.
EVS Draught Stop DIY Packs
The DIY Sliding Sash Draught Stop packs provide a solution that is ready to be installed into common sized timber framed windows. There are common sizes of Sliding sash windows and EVS has developed a pack size to minimize waste and make it easier to get targeted installation steps.
You can use common home DIY tools such as a small mitre saw with a fine tooth blade or a fine tooth handsaw. You will also need a good tape measure, screw drivers, a sharp pencil, and gap fillers
Mark out guide lines around the window using the small block on the sides and the wide block on the base with the window in a closed position.

Clean the edges so they free of grease, dust and loose flaking paint. Make sure they are thoroughly dried before applying the edges seals
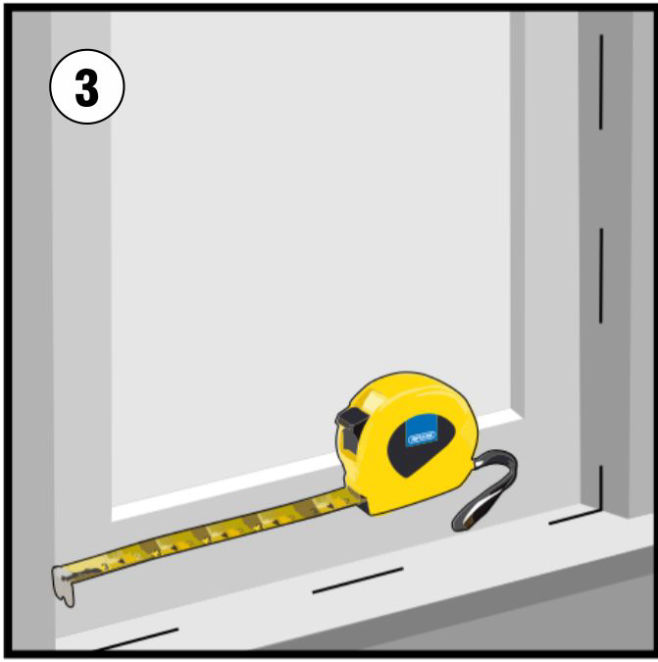
Measure between the inside faces and transfer the measurements to the back side of your Seals profiles.
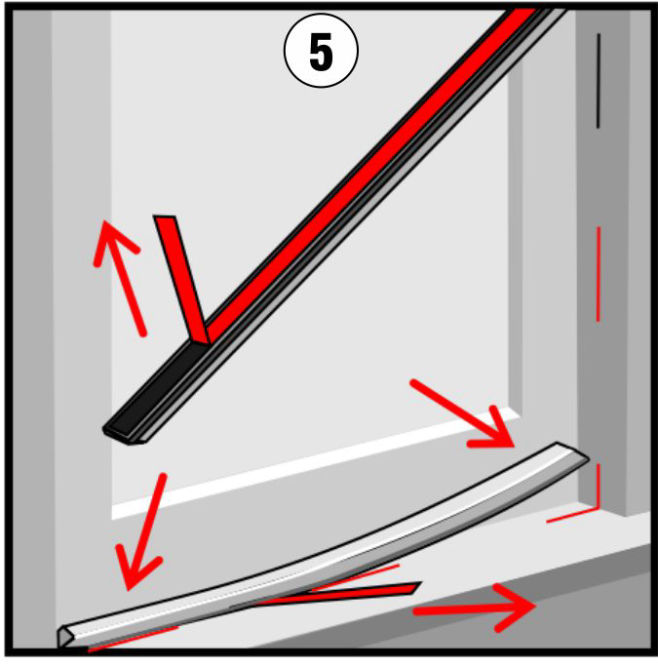
The top two draught profiles are cut at 90° to fit the full width. The lower Draught seals are trimmed at 45° miter cuts to form a nice joint.
Trim all the corners with 45° mitre cuts to form a nice joints using a mitre box or a mitre saw. Have the soft seal facing downwards with the back against the cutting support.
Trim all the corners with 45° mitre cuts to form a nice joints using a mitre box or a mitre saw. Have the soft seal facing downwards with the back against the cutting support.
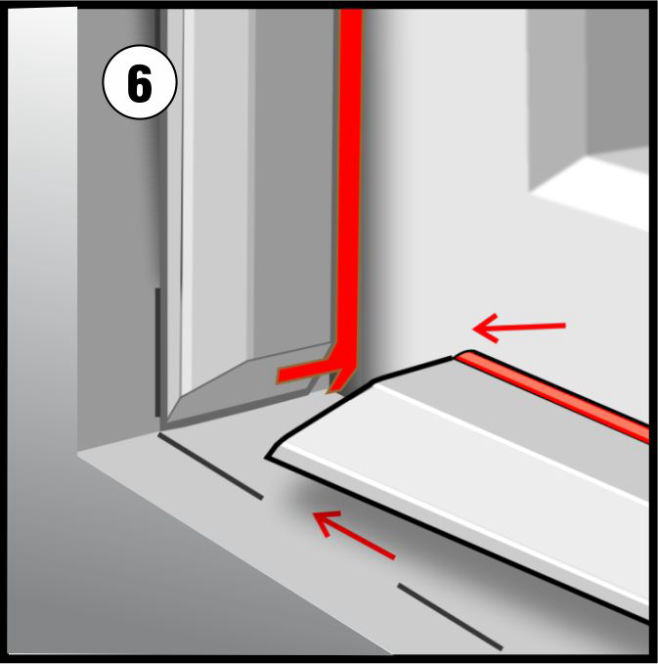
The top of your seal only needs to come up to the top of the opening panel. You can slightly sand the edge to make it look nice. Peel the backing tape from one end and press it firmly into marked position then pull back the rest of the backing tape and press down firmly.
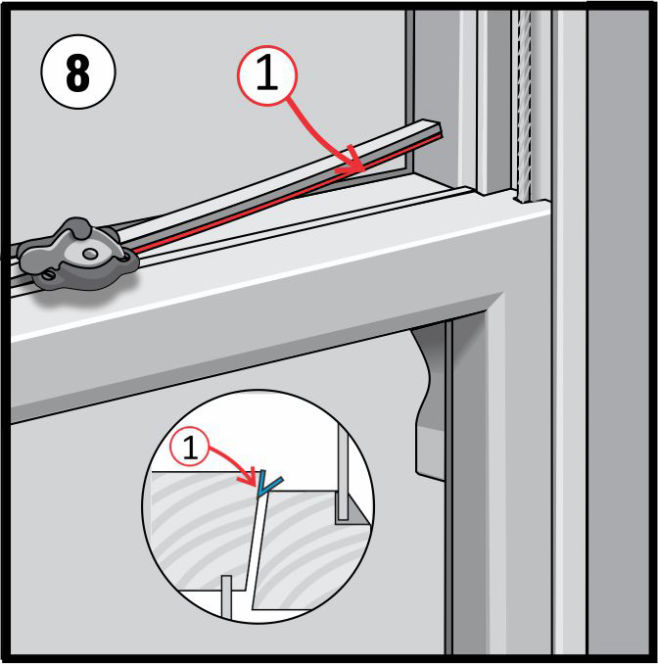
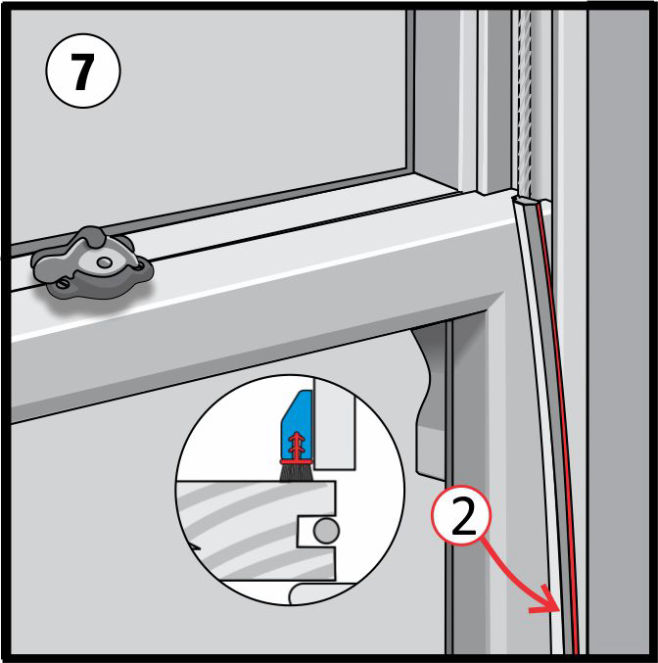
The Top Seal is a thing piece of folded plastic that springs open to close any gap between the two sashes. Open the bottom window and clean the back edge and dry before peeling the backing tape off. Make sure the ‘V-tape’ is positioned as shown in the diagram and press firmly to secure the V-tape in place.
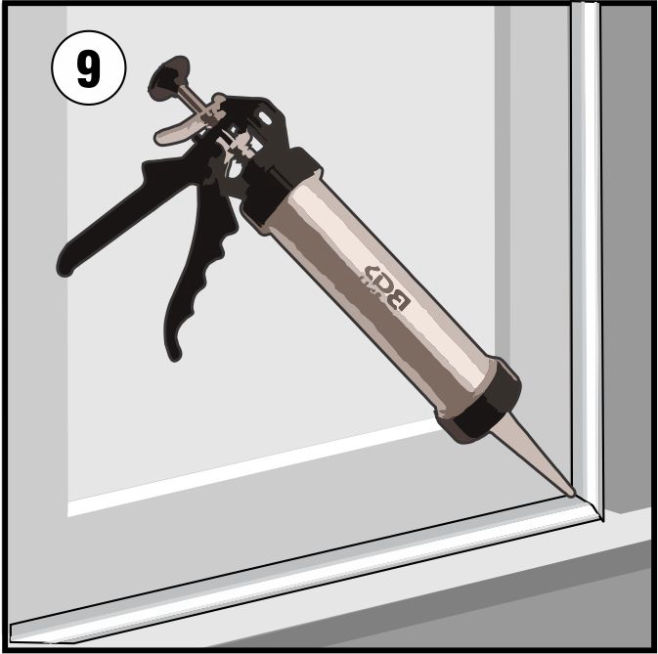
Acrylic gap filler like ‘No-More-Gaps’ can be used to fill the miter joints. Use a damp cloth to clean the area for a seamless result.
EVS Draught Stop DIY Packs
The DIY Sliding Sash Draught Stop packs provide a solution that is ready to be installed into common sized timber framed windows. There are common sizes of Sliding sash windows and EVS has developed a pack size to minimize waste and make it easier to get targeted installation steps.
You can use common home DIY tools such as a small mitre saw with a fine tooth blade or a fine tooth handsaw. You will also need a good tape measure, screw drivers, a sharp pencil, and gap fillers
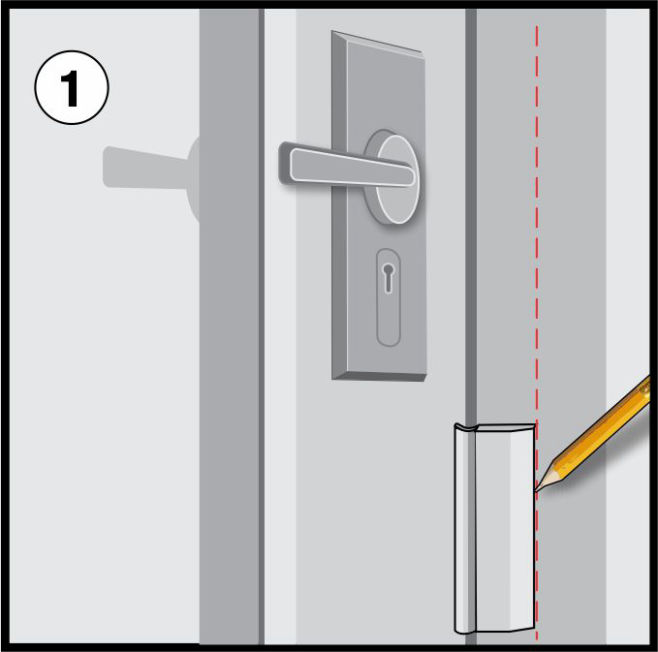
Mark out guide lines around the door frame using the small block on the sides and the wide block on the base with the window in a closed position.
Clean the edges so they free of grease, dust and loose flaking paint. Make sure they are thoroughly dried before applying the edges seals
Measure between the inside faces and transfer the measurements to the top side of the Draught Stop profiles. Make the size a tight fit so if necessary you can trim the length shorter.

The top two Draught profiles are cut at 90° to fit the full width. The lower Draught seals are trimmed at 45° miter cuts to form a nice joint.
Peel the beginning 10cm back tape of from your bottom section and press it firmly into marked position then pull back the rest of the backing tape and press down firmly.
Place each side into the correct position that has been marked out earlier. Do not pin the profiles yet in case further trimming is required.
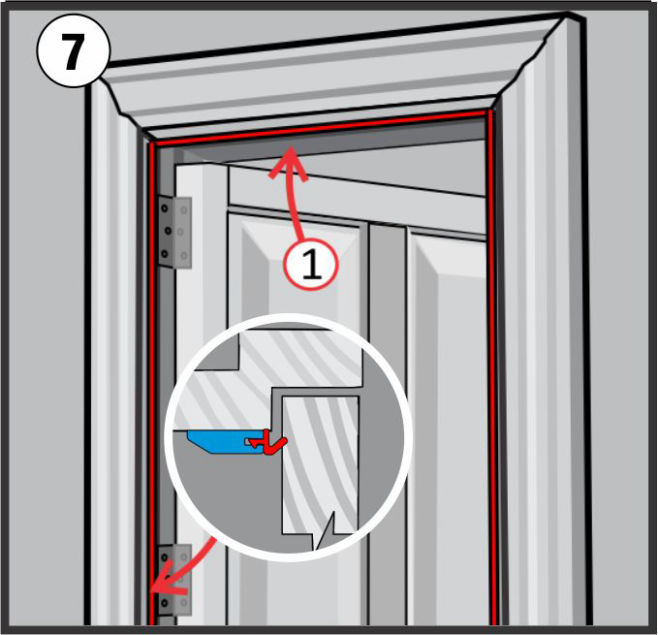
Install the top and sides on the door frame which may be on the interior or the exterior of the door. If it is the exterior face then it is recommended that you seal or paint the edge to prevent moisture penetration between the seal and the frame.
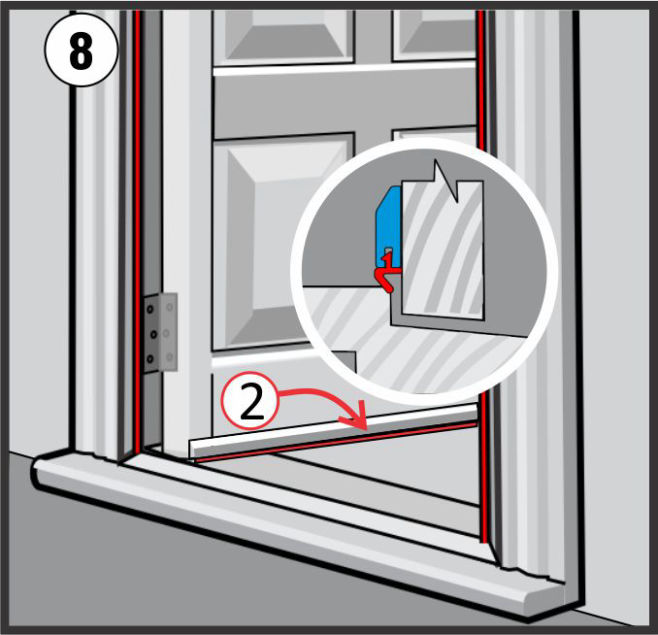
Install the draught stop across the base of the door if it opens outwards and closes against a raised up sill. If the door opens inwards over carpet or an uneven floor then you will need a Kick-Up seal rather than the V-Seal supplied.
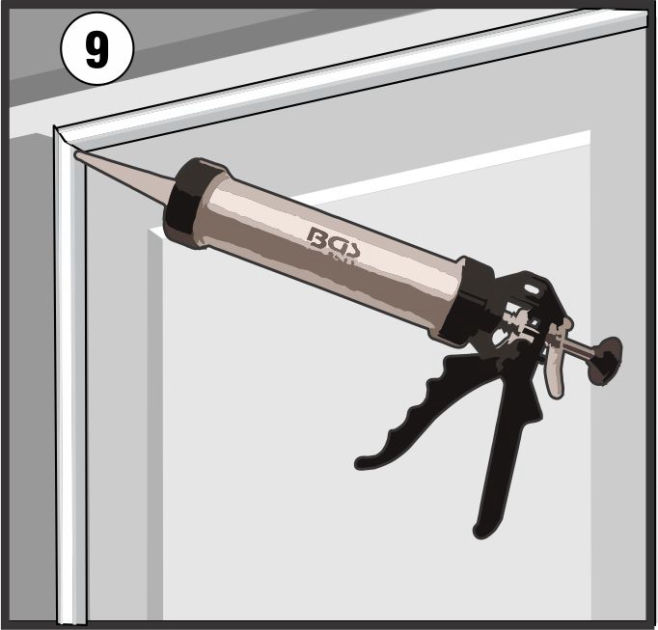
Acrylic gap filler like ‘No-More-Gaps’ can be used to fill the mitre joints. Use a damp cloth to clean the area for a seamless result.
Download your Copy
You can download your copy of the EVS Draught stop for inspiration and step by step instructions on how to install Draught Stop
EVSDraughtSeal.pdf

EVS Window Technology Ltd
122 Kaituki Ridge Lane
Queensberry Hills
Central Otago
New Zealand
Email: info@evsglazing.nz
Draught Stop orders Sales@evsdraughtstop.nz
Mobile: +64 (0) 27 4346 912