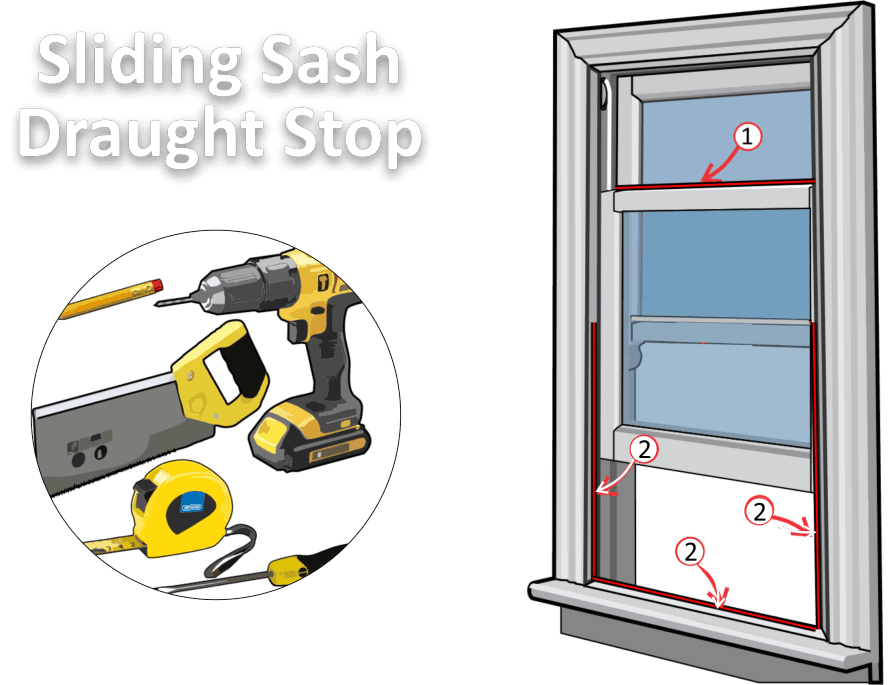
Sliding Sash Draught Stop
- Stop Draughts
- Reduce Noise
- Save Energy
- Stop Dust and Pollen
- Rain and moisture proof
- Fills gaps from up to 10mm
- EVS DIY Packs
- Permanent solution

- Stop Draughts
- Reduce Noise
- Save Energy
- Stop Dust and Pollen
- Rain and moisture proof
- Fills gaps from up to 10mm
- EVS DIY Packs
- Permanent solution
Do it once... Do it right!
Sliding sash windows are considered one of the more difficult window styles to be sealed against draughts because they require a gap to slide up and down freely. There are very few DIY options (if any) that can be easily fitted and work well. A professional may remove the retainer beads and slot them out and fit a fur seal around the three sides, however this is specialized work and takes time to remove and repair the retainer beads from the removal process.
The EVS Draught seals are quick and easy to fit and provide a permanent and attractive solutions because they use durable seals and rigid profiles. The EVS solution can take as little as 10 minutes to install an attractive low profile bead and seal solution. The seals use durable brush polypropylene that is ideal for allowing the sash to slide past while maintaining a good air seal.
The final part of the DIY kit includes a V-Tape strip that fits across the top of the window and fills the top gap and can adjust in size to fit most gaps. Sometime the gap is due to being misaligned with the top sash which may require installing another rigid V-Fur seal across the top to close the gap.
Other benefits are the elimination of of the noisy rattle that a lot of double hung windows from windy days.
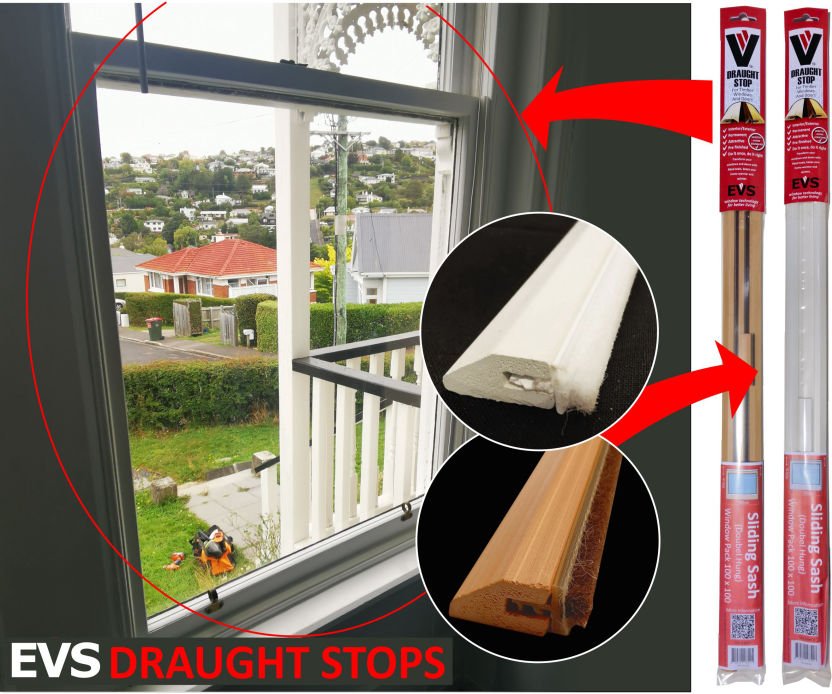
EVS Draught Stop DIY Packs
The DIY Sliding Sash Draught Stop packs provide a solution that is ready to be installed into common sized timber framed windows. There are common sizes of Sliding sash windows and EVS has developed a pack size to minimize waste and make it easier to get targeted installation steps.
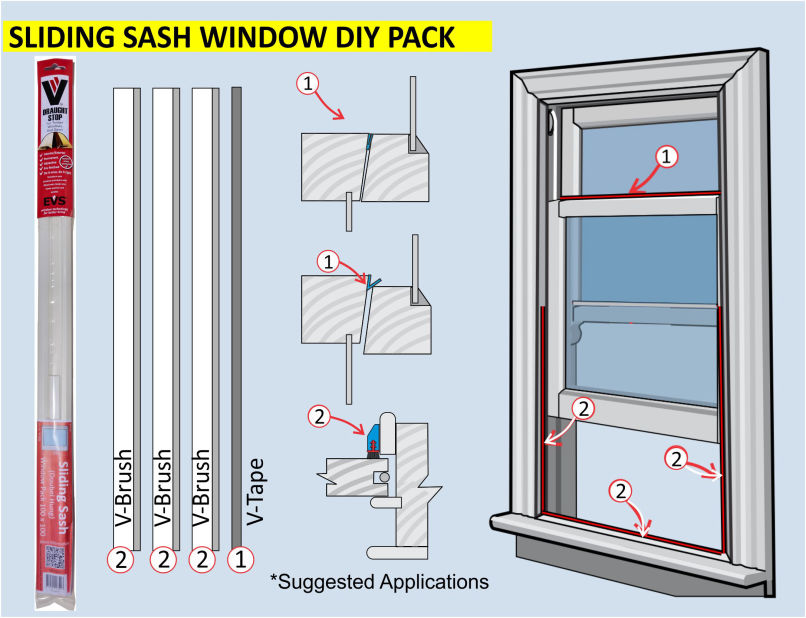
EVS Draught Stop DIY Packs
The DIY Sliding sash Pack comes with three lengths of V-Brush and one length of V-Tape that are suitable for Sliding Sash windows up to 100 x 100cm. The installation steps are suggested for installing for a typical style window. Each window may have different hardware or timber structures and installation may need to modified to suit your specific window requirements.
EVS Draught stops are available throughout New Zealand and can also be purchased online.
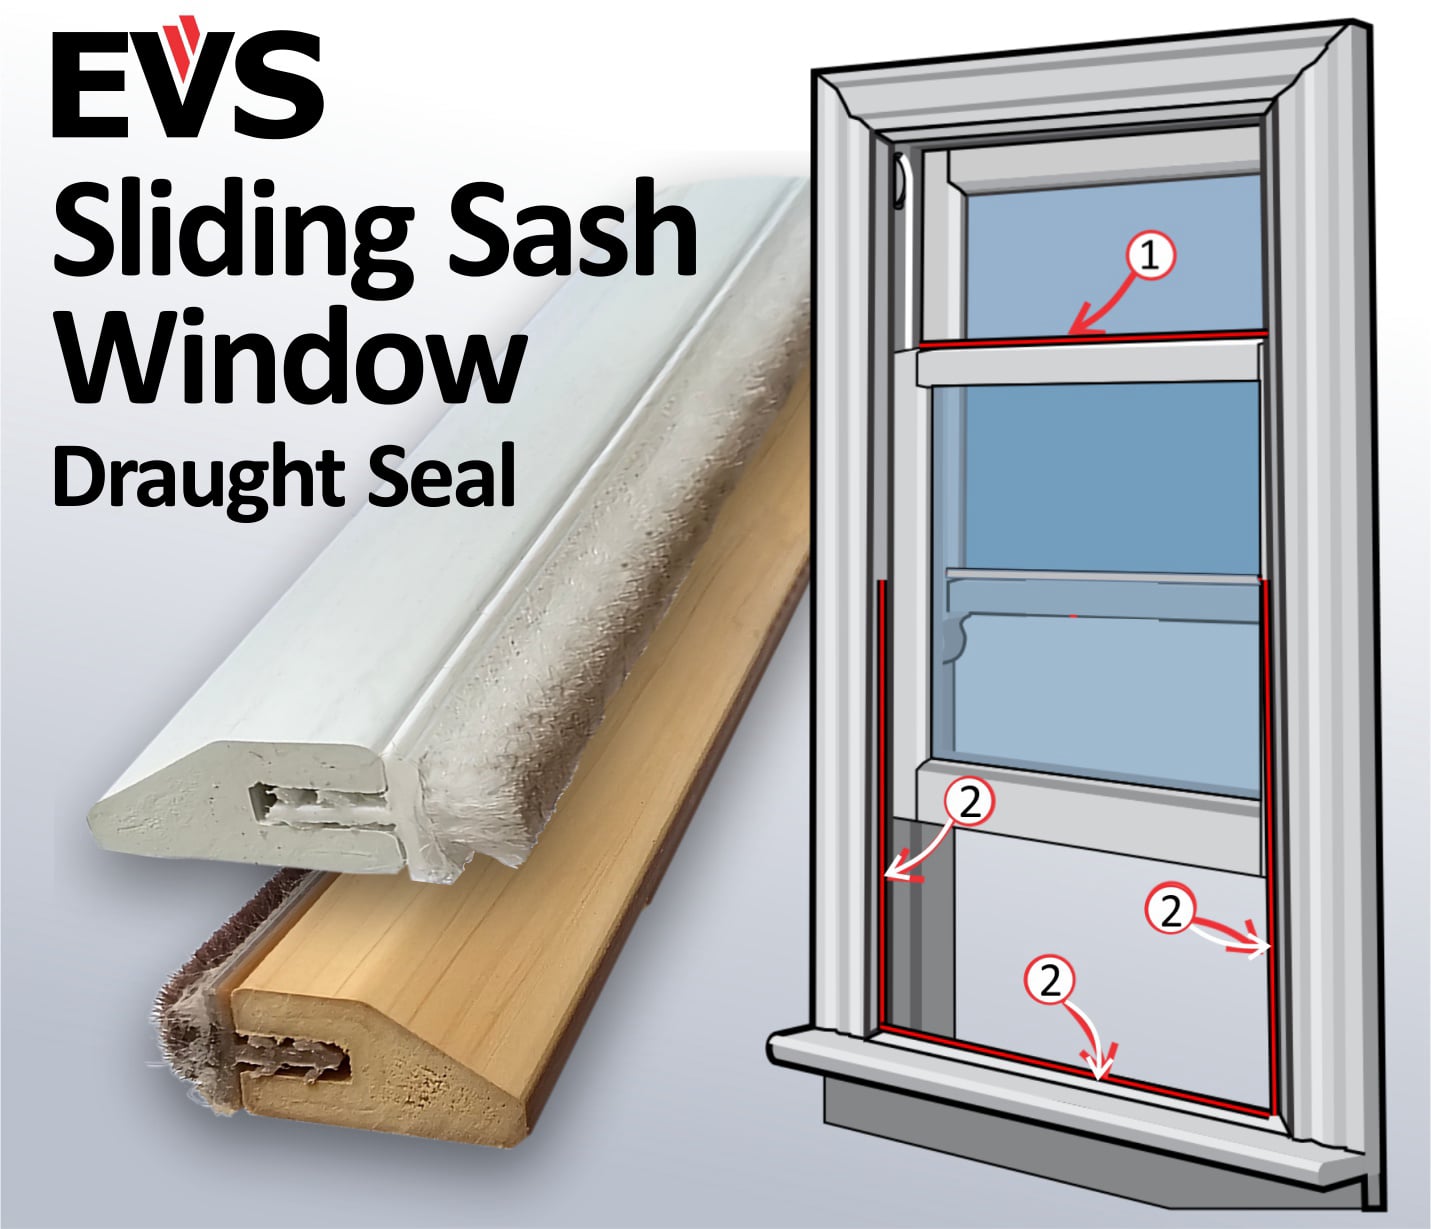
DIY Pack includes:
-2 Sides: Small V-Brush
-2 Tops: Small V-Brush
-1 Base: Small V-Brush
Prefinished in PVC timber or white
Shipping (extra)
$35.20
EVS Draught stops are available throughout New Zealand and can also be purchased online.

Exceed has a network of skilled Technicians that cover most of New Zealand and provide friendly helpful advice and service for installing your EVS draught seals
Visit their web site and request a quote. www.exceed.co.nz

Selected PlaceMakers stores provide the builders packs of Draught Seals and soon will be offering the DIY packs. If they are not in stock we can get them in usually within a week.
Contact your local store and ask about EVS Draught seals.

EVS is based in Otago and can offer Dunedin and Central Otago customers Draught Stop installation and supply. EVS can provide advice on how to install your Draught stops
Contact us if you want a price or advice. sales@evsdraughtstop.nz

You can use common home DIY tools such as a small mitre saw with a fine tooth blade or a fine tooth handsaw. You will also need a good tape measure, screw drivers, a sharp pencil, and gap fillers
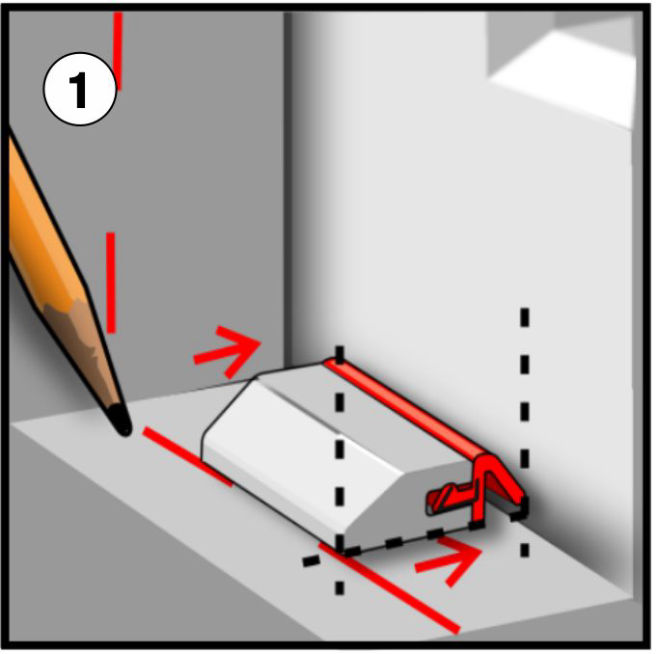
Mark out guide lines around the window using the small block on the sides and the wide block on the base with the window in a closed position.
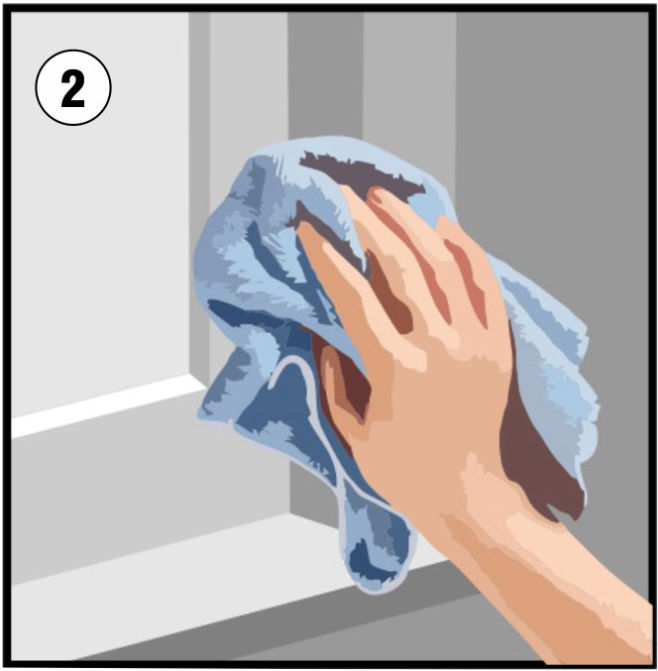
Clean the edges so they free of grease, dust and loose flaking paint. Make sure they are thoroughly dried before applying the edges seals
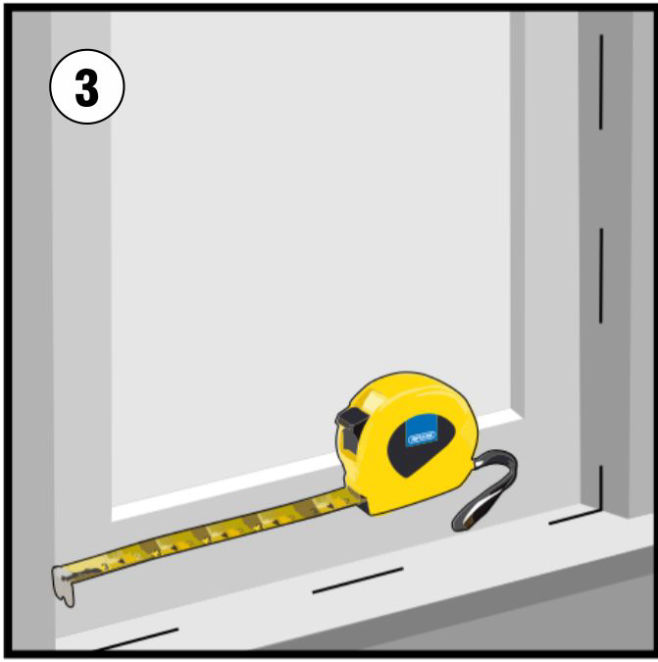
Measure between the inside faces and transfer the measurements to the back side of your Seals profiles.
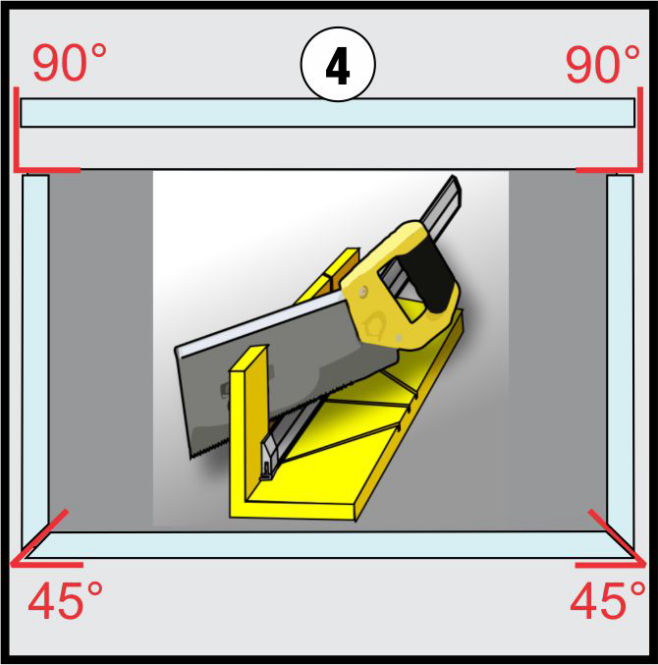
The top two draught profiles are cut at 90° to fit the full width. The lower Draught seals are trimmed at 45° miter cuts to form a nice joint.
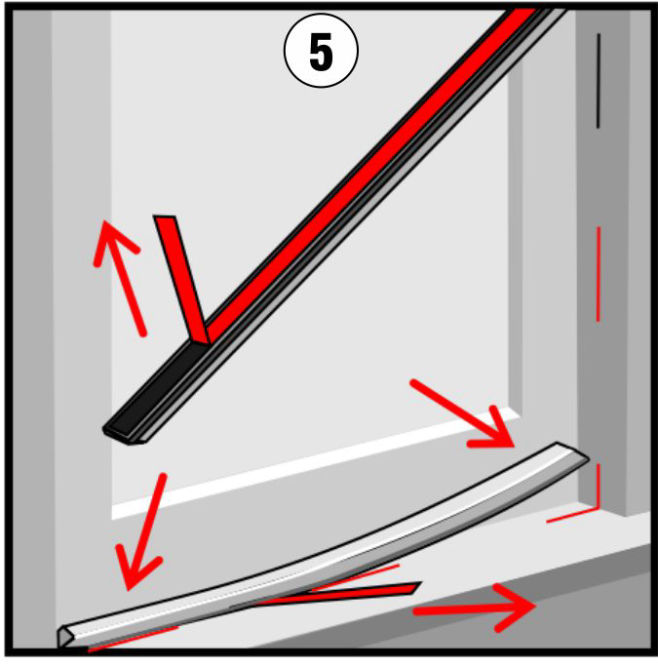
Trim all the corners with 45° mitre cuts to form a nice joints using a mitre box or a mitre saw. Have the soft seal facing downwards with the back against the cutting support.
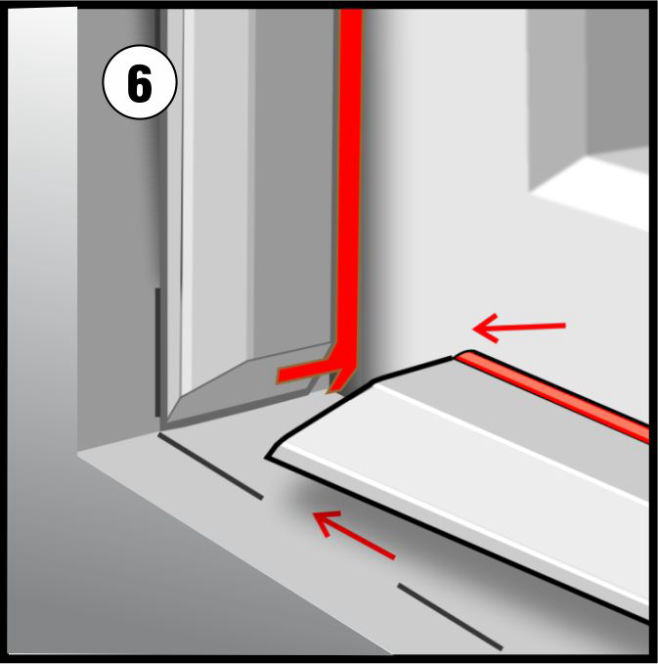
Trim all the corners with 45° mitre cuts to form a nice joints using a mitre box or a mitre saw. Have the soft seal facing downwards with the back against the cutting support.
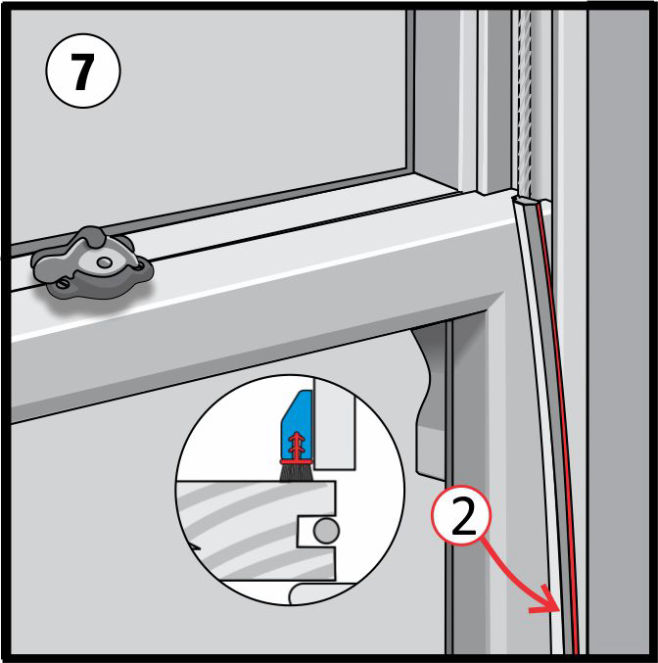
The top of your seal only needs to come up to the top of the opening panel. You can slightly sand the edge to make it look nice. Peel the backing tape from one end and press it firmly into marked position then pull back the rest of the backing tape and press down firmly.
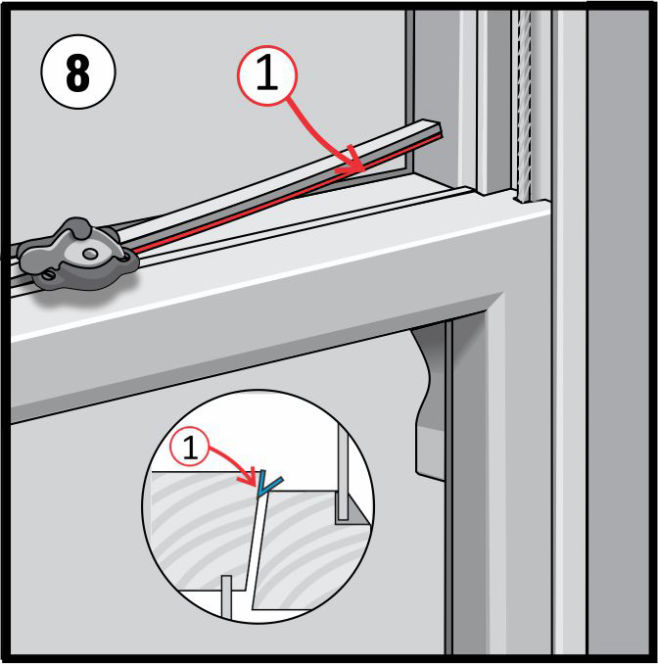
The Top Seal is a thing piece of folded plastic that springs open to close any gap between the two sashes. Open the bottom window and clean the back edge and dry before peeling the backing tape off. Make sure the ‘V-tape’ is positioned as shown in the diagram and press firmly to secure the V-tape in place.
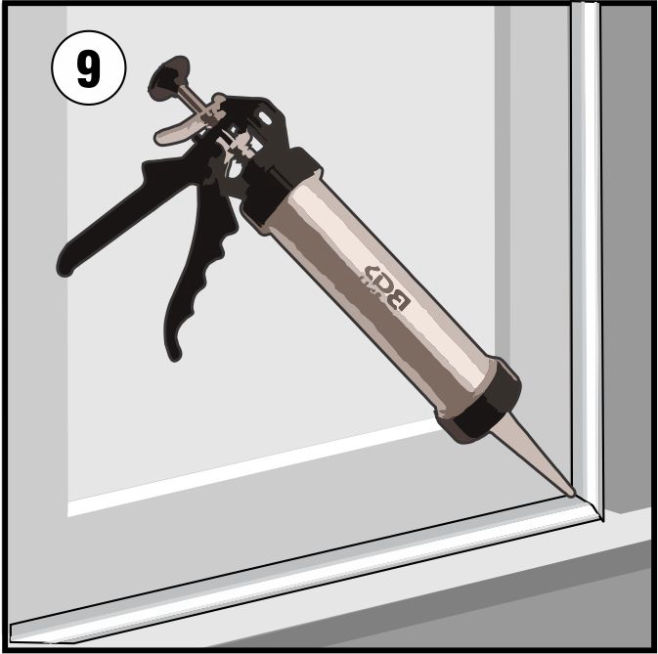
Acrylic gap filler like ‘No-More-Gaps’ can be used to fill the miter joints. Use a damp cloth to clean the area for a seamless result.
Download your Copy
You can download your copy of the EVS Draught stop for inspiration and step by step instructions on how to install Draught Stop
EVSDraughtSeal.pdf
Phone: +64 (0) 274346912
Email: info@evsglazing.nz